This post contains affiliate links. As an Amazon associate I earn from qualifying purchases. See my full disclosure.
This week for the 52 Weeks of Sensory challenge, we are doing a contact paper sensory activity! It's a fun and creative activity for toddlers, and there are many different ways
What is contact paper?
Contact paper is a roll of thin plasticky paper that is sticky on one side. It can be clear, or it can have a pretty design on one side. For this activity you'll need clear contact paper.
Contact paper can be easily cut with scissors and is often used to line kitchen cabinets and drawers to protect them and make them easily wipe-able.
Because of its sticky backing, contact paper can be used for fun sensory crafts for toddlers!
Where to get contact paper
You can find contact paper in the home and kitchen section of department stores, in craft stores, and even in dollar stores. And of course, you can get it online.
Contact Paper Sensory Activities
Tape contact paper to the floor or the wall and let your child explore its stickiness as a fun contact paper sensory activity!
Materials
- A few feet of contact paper
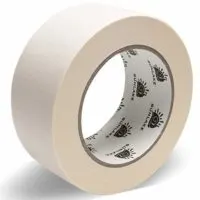
- Masking tape
- Props, such as craft pom poms, construction paper, cotton balls, small paper shapes, pieces of yarn, felt, buttons, small toys, pictures from coloring books (or printables), etc.
Tools
- Scissors
Instructions
Option 1 (Week 44):
- Find a clean area on a hardwood or tile floor (this won't work on a rug or carpet!). Tape down one side of the contact paper, sticky side up, then roll out the paper for as many feet as you like, and tape down the other end.
- Optional: slide in pictures from coloring books underneath the contact paper.
- Tape down the other two sides of the contact paper.
- Encourage your child to walk, jump and play on the contact paper. They can use any of the props to stick onto the paper.
Option 2 (Week 46):
- Tape a page from a coloring book or a printable coloring page to the wall at eye-level for your child.
- Cut a piece of contact paper slightly larger than the coloring page. Tape it to the wall over the coloring page, sticky side out.
- Give your child pieces of paper, string, pom poms, or cotton balls to stick onto the contact paper to "color in" the picture.
Recommended Products
As an Amazon Associate and member of other affiliate programs, I earn from qualifying purchases.
Psst, if you happened to come across this page and are wondering what the heck this is all about: We are doing the 52 Weeks of Sensory challenge. Come join us!


